

I remember the day it happened like it was yesterday. A stray rock, launched with an almost malicious intent from the tires of a passing truck, connected with my windshield with a sickening crack. My heart sank with the glass. I’m not usually one to panic, but the thought of navigating the complexities of auto window repair filled me with a sudden dread. Would it be expensive? Could I even fix it myself? What if I made it worse?
Since then, I’ve had my fair share of chipped, cracked, and even shattered auto glass experiences. And through each one, I’ve learned a little bit more, acquiring a skillset that I now rely on without hesitation. I’ve come to understand that while auto window repair might seem daunting at first, it’s often a manageable task, especially for smaller blemishes. There are, however, some essential tips I’ve picked up along the way that can make all the difference between a successful DIY fix and a costly professional intervention. I’m excited to share these insights with you, hoping to demystify the process and empower you to tackle those unwelcome cracks and chips with confidence.
This is the first and arguably most crucial step. I’ve seen too many people attempt a DIY repair only to realize too late that the damage was beyond their capabilities, resulting in a bigger headache and a more expensive bill in the long run. My rule of thumb is simple: assess the damage carefully before even thinking about reaching for a repair kit.
The Size and Location Matter
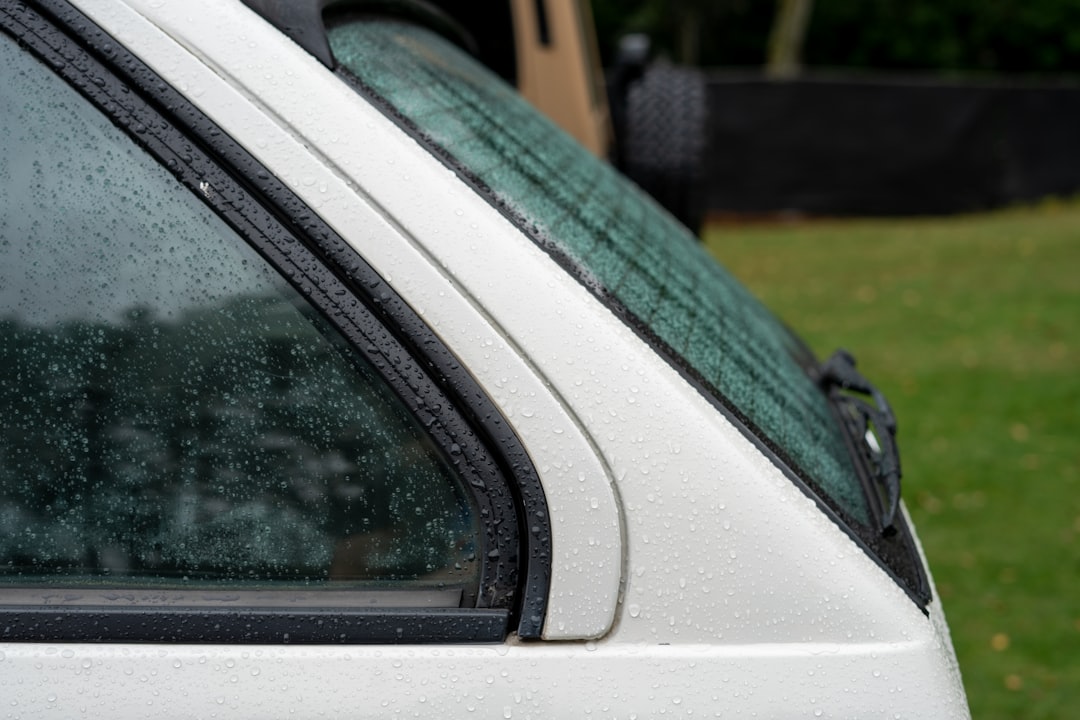
When I inspect damage, my primary focus is on its size and location. If a chip is smaller than a quarter and not in my direct line of sight while driving, I immediately consider it a strong candidate for a DIY repair kit. These smaller chips, often referred to as “bullseyes” or “star breaks,” are typically superficial and can be effectively sealed with resin. However, if the damage is larger than a quarter, or if it’s a long crack, my DIY instinct starts to waver. Large cracks, especially those that extend more than a few inches, often compromise the structural integrity of the glass more significantly than a small chip.
The location is also paramount. A small chip on the edge of the windshield or near the rearview mirror is one thing, but a similar chip directly in my field of vision is a completely different ballgame. Even a perfectly repaired chip can leave a slight distortion, and this distortion can be a significant hazard if it obstructs my view of the road. I prioritize safety above all else, so any damage that impairs my driving vision immediately flags it as a job for a trained professional. They have the expertise to either repair it with minimal visual distortion or, more often than not, recommend a full windshield replacement to guarantee my safety.
Differentiating Between Chips and Cracks
Another critical distinction I make is between a chip and a crack. A chip is generally a localized impact point, often circular or star-shaped. These are typically simpler to repair as the damage is contained. A crack, on the other hand, is a linear break that can propagate across the glass. I’ve learned that even a small crack, if left untreated, can quickly expand due to changes in temperature, road vibrations, or even just hitting another bump.
My experience has taught me that while some very small, superficial cracks might be candidates for DIY kits, any crack that shows signs of spreading or is longer than a credit card is usually beyond the scope of a home repair. The resin in DIY kits is designed to fill small voids and prevent further spread, but it’s not a magic bullet for extensive linear damage. Attempting to repair a long crack with a kit can sometimes even make it worse, pushing the resin into areas it shouldn’t be, or making the glass harder for a professional to replace accurately if the DIY attempt fails. When I see an extensive crack, I tend to think “replacement” rather than “repair,” and that’s an indication for me to call in the experts.
Choosing the Right Repair Kit: Quality Over Cost
Once I’ve determined that a DIY repair is feasible, my next step is always to select the right repair kit. This is where I’ve learned that economizing too much can backfire spectacularly. I’ve made the mistake of picking up the cheapest kit available and regretted it almost instantly. The quality of the resin, the applicator, and the curing strip all play a significant role in the success of the repair.
Understanding Resin Types and Application Methods
When I’m looking at repair kits, I pay close attention to the type of resin included. Most kits use a clear, acrylic-based resin that cures with UV light. I’ve found that higher-quality resins tend to be thinner, allowing them to penetrate deeper into the fine crevices of the chip, and they often cure to a stronger, clearer finish. Some kits even offer tinted resins for specific glass types, though for a standard windshield, clear is always my go-to.
The application method is also crucial for me. I prefer kits that utilize a syringe-style applicator or a vacuum-pressure device. These methods allow me to create a vacuum over the damaged area, drawing out any air trapped within the chip before injecting the resin. This vacuum is vital because air bubbles trapped in the resin can weaken the repair and make it more visible. Simpler kits that rely on just squeezing resin onto the chip often leave more air pockets, leading to a less satisfying and potentially weaker repair. I look for kits that explicitly mention their ability to remove air from the damage before filling.
What to Look for in a Comprehensive Kit
A truly comprehensive repair kit, in my experience, includes several key components that make the repair process smoother and more effective. Beyond the resin and applicator, I always look for a good curing strip or film. This transparent film is placed over the resin after application and helps to create a smooth, flat surface as the resin cures. It also protects the resin from dust and debris during the curing process, which is often done under direct sunlight or with a UV lamp included in more advanced kits.
Furthermore, a good kit will include a razor blade or scraper for removing excess cured resin. This is essential for a clean finish and to prevent any raised blemishes on the glass. I also appreciate kits that come with cleaning wipes or a small amount of rubbing alcohol to ensure the damaged area is completely free of dirt and grease before starting the repair. A clean surface is paramount for the resin to adhere properly. I’ve learned that skipping this seemingly minor step can significantly impact the longevity and appearance of the repair.
Preparation is Key: A Clean Surface is a Successful Repair
I cannot stress this enough: preparation is the most critical step in any auto window repair. I’ve seen countless DIY attempts fail because people rush this stage or simply overlook it. A meticulously clean and dry surface is absolutely non-negotiable for the resin to properly bond and for the repair to be effective and durable.
Cleaning the Damaged Area Thoroughly
Before I even think about opening the repair kit, I dedicate a good amount of time to cleaning the damaged area. I start by removing any loose shards of glass from the chip using a pin or the corner of a credit card – never my fingers, as even microscopic dust from my skin can cause issues. Then, I use a high-quality glass cleaner and a microfiber cloth to thoroughly clean both the inside and outside of the windshield around the damage. I’m not just wiping; I’m actively scrubbing to remove any dirt, dust, grime, or even wax residue that might have accumulated.
After the initial cleaning, I follow up with denatured alcohol or isopropyl alcohol. This step is crucial because it evaporates quickly and leaves no residue, ensuring the glass is pristine. I apply it generously with a clean cloth, making sure to get into all the nooks and crannies of the chip or crack. My goal is to create a sterile environment for the resin to adhere to. I always use a fresh, lint-free cloth for this final wipe, as even a tiny fiber can become trapped in the resin and create a visible flaw.
Ensuring the Surface is Completely Dry
Equally important to cleanliness is dryness. Any moisture, even in trace amounts, can prevent the resin from curing properly and bonding effectively with the glass. After cleaning, I let the area air dry for a significant amount of time, especially in humid conditions. If I’m in a hurry, I might use a hairdryer on a cool or low-heat setting, keeping it at a safe distance to avoid overheating the glass. However, I prefer natural air drying whenever possible.
I also pay attention to the external environment. If it’s raining or heavily humid, I absolutely postpone the repair. Trying to fix a chip in damp conditions is a recipe for disaster. The resin simply won’t set correctly, and I’ll end up with a weak repair that will likely fail soon after. I’ve learned to be patient and wait for optimal conditions – a dry, clear day with moderate temperatures is ideal. This meticulous attention to cleanliness and dryness dramatically increases the chances of a strong, almost invisible repair.
Precise Application and Curing: Patience is a Virtue

I’ve learned that rushing the application and curing process is a surefire way to compromise the integrity and appearance of the repair. Precision and patience are paramount here. This isn’t a race; it’s a delicate operation that requires a steady hand and adherence to the manufacturer’s instructions.
Following Manufacturer Instructions to the Letter
Every repair kit is slightly different, and I’ve found that deviating from the specific instructions is rarely a good idea. I always take the time to read the manual thoroughly, even if I’ve used similar kits before. What resin volume, what pressure, and what curing time? These details can vary between brands. For instance, some kits require placing a small adhesive ring around the chip first, while others have a standalone applicator that suctions directly to the glass. I strictly follow the recommended amount of resin to use; too little won’t fill the void, and too much will create a mess and a visible bump.
When applying the resin, I always aim for a slow, steady pressure. My goal is to allow the resin to gradually seep into every crevice of the chip, displacing any remaining air. If the kit involves creating a vacuum, I ensure I follow the steps carefully to maximize air removal before injection. I also pay attention to the orientation of the applicator; sometimes, a slight tilt can help the resin flow better into complex chip patterns. This meticulous approach ensures maximum penetration and a more complete fill, leading to a stronger and less visible repair.
Optimal Curing Techniques and Finishing
The curing phase is where the resin hardens and becomes an integral part of the glass. I’ve learned that using a curing strip or film, as mentioned earlier, is essential. Once I’ve applied the resin and removed any air bubbles, I carefully place this strip over the repair, pressing down gently to ensure the resin is spread evenly and flush with the windshield surface. This creates a smooth final finish and prevents the resin from becoming distorted as it cures.
For curing, UV light is the magic ingredient. Most kits rely on natural sunlight. I consistently park my car in direct sunlight with the repaired area exposed to the sun’s rays for the recommended time – usually 15 to 30 minutes, but it can vary. On overcast days, or if the kit includes a UV lamp, I opt for the lamp, ensuring it’s positioned correctly and used for the specified duration. Insufficient curing will leave the resin soft and vulnerable, while over-curing can sometimes make it brittle.
After the resin has fully cured, I carefully peel off the curing strip. There will typically be a small amount of excess, cured resin on the surface. This is where a sharp razor blade, held at a shallow angle (almost parallel to the glass), comes in. With gentle, short strokes, I carefully scrape away the excess, taking care not to scratch the surrounding glass. I aim for a perfectly flush, smooth finish. Then, a final wipe with a clean cloth and glass cleaner completes the repair. I always step back and inspect the repair from various angles to ensure it’s as invisible as possible and that no rough edges or resin blobs remain.
Post-Repair Care and Maintenance: Protecting Your Investment
| Service Provider | Location | Customer Rating | Response Time |
|---|---|---|---|
| ABC Auto Glass | City A | 4.5/5 | 1 hour |
| XYZ Auto Repair | City B | 4.8/5 | 45 minutes |
| 123 Auto Glass | City C | 4.2/5 | 1.5 hours |
I often think of a successfully repaired auto window as a small victory, but my job isn’t entirely done after the curing and scraping. Proper post-repair care and ongoing maintenance are crucial to prolong the life of the repair and ensure the longevity of my windshield. I’ve learned that overlooking these steps can lead to premature failure of the fix.
Avoiding Immediate Stress on the Repaired Area
Just like a cast on a broken bone, a fresh auto window repair needs time to fully integrate and strengthen. Immediately after completing the repair, I make a conscious effort to avoid any activities that could put undue stress on the repaired area. This means no blasting the defroster or air conditioner directly onto the spot, especially if there’s a significant temperature difference between the interior and exterior of the car. Extreme temperature fluctuations can cause the glass to expand and contract, potentially weakening the freshly cured resin.
I also try to avoid hitting any major bumps or potholes for at least 24 to 48 hours after the repair, if at all possible. While the resin is cured, the bond is still settling and reaching its maximum strength. Road vibrations and sudden impacts could disrupt this process. I also advise against slamming car doors or applying excessive pressure to the windshield in the vicinity of the repair. It’s a small window of caution, but it can make a big difference in the long-term success of the fix. Treat it gently, and it will serve you well.
Regular Inspection and Cleaning Practices
Even after a successful repair, I incorporate regular inspection of my windshield and other auto glass into my car maintenance routine. I don’t just look for new damage; I specifically check on previous repairs to ensure they are still holding strong. I look for any signs of cracking around the repair, haziness, or if the original chip has somehow become more visible. If I notice any of these issues, it’s a clear indication that the repair might be failing, and I’ll need to reassess whether further action is required, such as a professional repair or replacement.
When cleaning my windshield, I always use automotive-specific glass cleaners and soft microfiber cloths. I avoid harsh abrasives or chemicals that could potentially degrade the resin over time. While the cured resin is typically quite durable, I still treat it with care. I also ensure my wiper blades are in good condition. Worn, chattering wiper blades can put unnecessary stress on the windshield, and if they happen to drag across a repaired area with a slight imperfection, it could eventually compromise the fix. By staying vigilant and treating my repaired auto glass with ongoing care, I ensure that my initial DIY effort continues to protect my eyesight and my vehicle’s structural integrity for as long as possible.